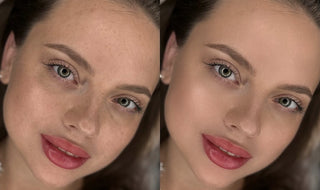

As a permanent makeup (PMU) artist, your portfolio is one of the most important tools for attracting new clients and showcasing your skills. While creating beautiful, lasting results is the core of your work, the way you present those results online is equally crucial. Effective photo editing can make all the difference in how potential clients perceive your work. In this article, we’ll discuss why editing is essential and how you can create a polished, professional portfolio that highlights your artistry.
Why Photo Editing Matters
When potential clients browse your portfolio, they are looking for two things: skill and professionalism. Well-edited photos not only emphasize the technical precision of your work but also present it in a clean, consistent, and flattering manner. Editing doesn’t mean altering the results of your PMU procedures, but rather enhancing the overall quality of the images to reflect the true beauty of your work.
Key Benefits of Editing Your PMU Photos:
- Consistency: Edited photos ensure your portfolio has a cohesive look, making your work appear more polished and professional.
- Positioning the Face Correctly: Ensuring the client’s face is positioned correctly in every image creates a clear focus on the area you’ve worked on, such as brows, lips, or eyeliner. This positioning helps guide the viewer’s attention directly to the PMU work without unnecessary distractions.
- Eliminate Distractions: By cropping or removing unnecessary background elements, you keep the focus on your PMU artistry.
- Accurate Color Representation: Proper color correction ensures the pigments you’ve used are showcased as they appear in person.
- Minimize Skin Imperfections: Editing small skin imperfections helps ensure that the client’s attention is focused on the quality of your work rather than any blemishes or distractions. This is especially important for social media platforms like Instagram, where a clean, aesthetically pleasing image draws more attention.
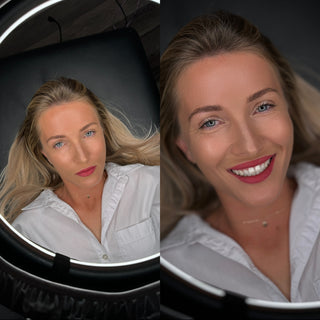
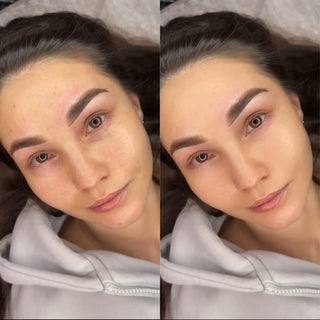
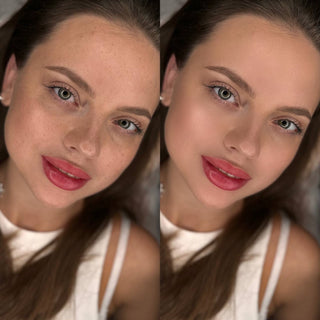
Here are the collage examples of how you can edit pictures of your work so your portfolio looks more appealing to your potential clients.

Step-by-Step Guide to Editing Your PMU Photos
1. Start with High-Quality Raw Images
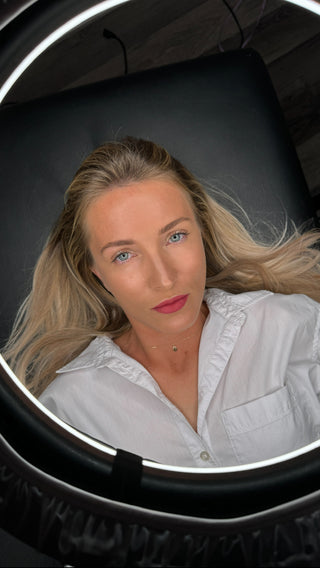
Before you dive into editing, you need strong raw images. Use asmartphone camera with good lighting, ideally using a ring light for even, flattering illumination. Make sure the photos are sharp, focused, and well-composed.
Here is an example of how your photo should look before editing.

Before

Before
2. Correct Face Positioning
One of the most crucial aspects of taking and editing PMU photos is ensuring that the client’s face is positioned correctly. The face should be centered, and the area where the PMU procedure was done should be clearly visible. This ensures that viewers can immediately focus on your work without being distracted by awkward angles or poor positioning.
Tip: When photographing a client, capture multiple angles that highlight the treated area. For example, a close-up of the brows or lips with a centered, well-lit face gives a more professional, clear result.
Here are example of bad poses:

And here are the examples of good poses that will attract potential clients:


3. Basic Edits: Cropping and Straightening
Once you have your raw images, start by cropping the image to remove unnecessary background distractions. Ensure the client’s face and the treated area are properly centered and straightened. This creates a clean, focused image that highlights your work.
Tip: When cropping, focus on the treated area and avoid cutting off too much of the face. You want to show the full context of your work while keeping the attention on the treatment.
4. Lighting and Exposure Adjustments
While good lighting is essential during the procedure, small adjustments in exposure or brightness can enhance the clarity of your photos. Adjust the brightness, contrast, and shadows to make the results more visible, but avoid over-editing to keep the images looking natural.
Recommended Tool: Adobe Lightroom or any photo editing app with easy exposure and brightness controls.
5. Retouching Skin Imperfections to Keep the Focus on Your Work
One of the key aspects of editing your PMU photos is minimizing skin imperfections. Blemishes, redness, and other distractions can take attention away from your work. A quick retouch of these imperfections keeps the focus squarely on the results of your artistry.
However, it’s important not to over-edit the image. The goal is to enhance the client’s natural features and showcase your PMU work without altering the appearance too much. This means focusing on editing only the area around the work, such as the surrounding skin, while keeping the integrity of the face and PMU results intact.
Tip: Use light retouching techniques to smooth out skin while preserving natural texture. Avoid smoothing the entire face too much, as this can look unnatural and misrepresent the true results of your work.
Recommended Tool: Adobe Photoshop or similar software for light blemish removal and skin smoothing.
6. Consistent Filters and Presentation
Once you’ve made all the necessary adjustments, consider using a consistent filter or preset across all of your portfolio images. This adds uniformity to your portfolio and gives it a cohesive, professional look.
Tip: Use subtle, natural-looking filters that enhance the image without overshadowing your work. A consistent color palette across your photos will make your portfolio look more organized.
And here are the example of how your photo and video should look after basic edits:

After

After
As you can see, your work should stay untouched.
The Power of Before-and-After Photos
Before-and-after photos are the heart of any PMU portfolio. Proper editing can enhance these transformation images, ensuring they are clear, professional, and compelling.
Steps to Editing Before-and-After Photos:
- Ensure consistent lighting and positioning in both the before and after photos.
- Edit both images together to maintain color consistency and create a seamless comparison.
- Use side-by-side layouts or split-screen effects for easy viewing and comparison.
Tip: Always be transparent about how much time has passed between the treatment and the after photo. Show both the immediate results and healed results if possible.
Tools and Apps for Editing
You don’t need to be a professional photographer to edit your PMU portfolio effectively. There are several tools and apps available that make editing simple, even for beginners.
Recommended Photo Editing Tools:
- Adobe Lightroom: Ideal for exposure adjustments, color correction, and overall enhancement.
- Snapseed: A user-friendly mobile app for quick edits, perfect for beginners.
- Canva: Great for creating side-by-side comparisons, before-and-after layouts, and adding watermarks or captions.
- Facetune: Useful for light retouching and eliminating distractions, but use it sparingly to maintain honesty in your portfolio.
Checkout photo and video editing tutorial on our Instagram.


